How to Setup a New EC2 Instance on AWS
Build your own castle in the sky... err, cloud.
Amazon's cloud services are arguably the cheapest and most stable platform on which to build a distributed set of web services and applications. I've chosen to build my next web app using their EC2 service because of it's easy, consistent installation and control of all the features I want. If you're looking to do something similar, this article will show you how to get up an running.
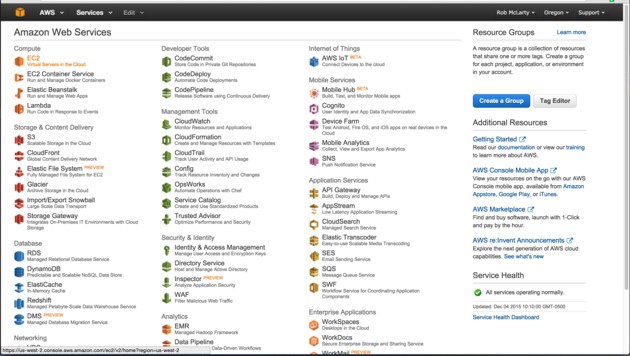
Choose EC2
First step is, choose "EC2" from the plethora of Amazon Web Services. This is a virtual server that will have its own operating system image installed and allow you a small amount of disk-space, RAM, and CPU (which is configurable of course). This is a great place to start building a new app from the ground up. As your app grows and you start hitting scaling issues, you can, from here, swap out components that have bottle-necked into other, more dedicated, services (e.g., need more storage for user generated content? save that into an S3 bucket instead of on your EC2 instance).
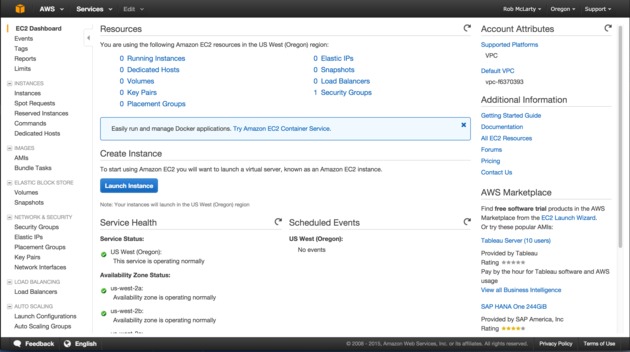
Launch a New Instance
From the EC2 Dashboard, you want to click on the big blue button that says "Launch Instance". This is what gets you started making a new server.
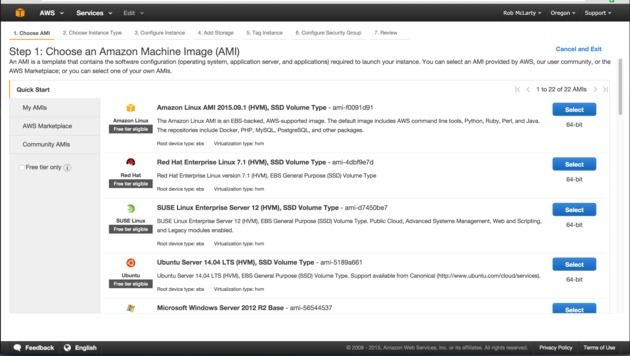
Pick an Operating System
Choose your desired operating system. There's lots of stuff to choose from and your choice will depend on your needs. Personally, I really like Ubuntu because it is debian based and comes with the amazing apt-get package manager which makes installing server software a breeze.
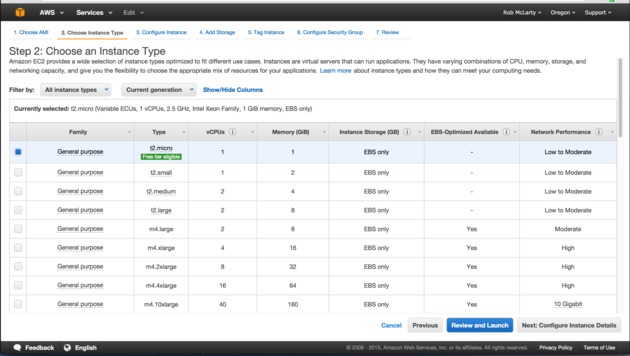
Choose an Instance Type
Choose what type of instance you want. There is a range,
from small to big. The bigger the instance, the more money it will cost you. If
I remember correctly, when you setup your first t2.micro instance, it will be
free (but has limited resources).
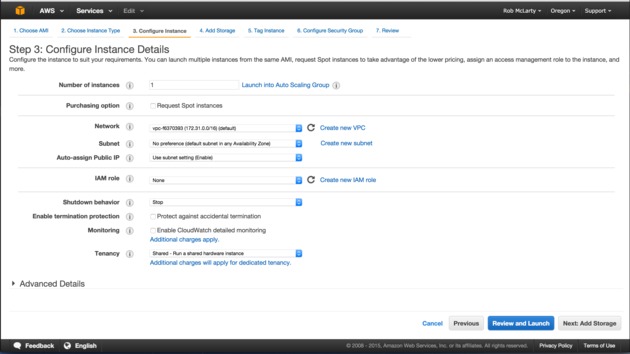
Instance Details
This step allows you to tweak your instance's settings. The defaults are usually pretty good.
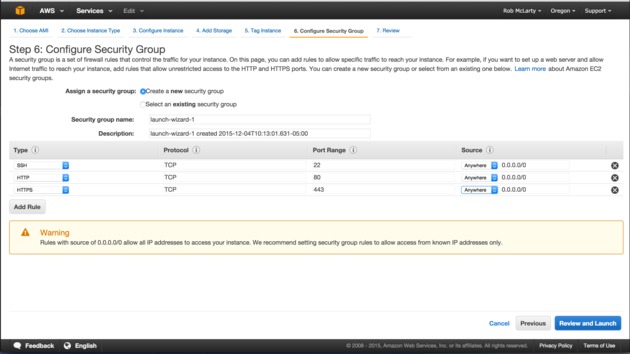
Configure Security Group
This is important: configuring your instance's security group. What this does is make a group of protocol and port settings that your instance will be permitted to use. So, for example, if you want to use your instance as a web server, you'll need to open up ports 80 and 443 (ssl). It's also a good idea to have port 22 open so that you can SSH into your instance and actually do stuff with it ;)
One thing to note is that you can restrict those ports even further, down to a specific IP address. So, for instance, you may want to restrict all SSH access only from your own personal IP address so that only a user coming from your actual internet connection could ever possibly connect over that channel. The web ports, however, you probably want to leave wide open so anyone in the world can actually see your web app. Choose the security options you like, and proceed to the next step.
Review
The last step of the "launch" process presents you with a review screen. Check over all the settings to make sure they're what you intended and then hit the big blue "Launch" button in the bottom right of the screen.

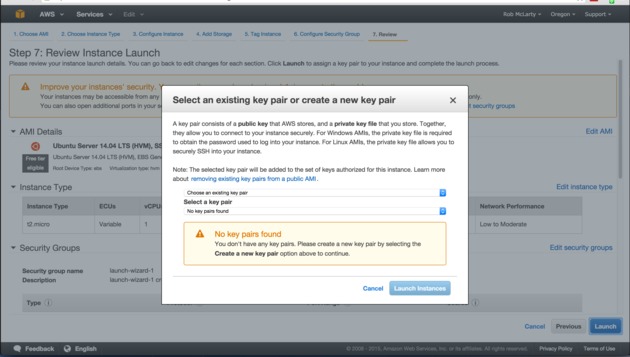
Security Key Pair
After pressing "Launch" you'll be presented with a modal window that will ask you to choose an encryption key pair (for SSH) that you want to use for accessing your new instance. If you don't already have an existing key-pair to choose from the drop-down, choose "Create a new key pair" instead and make a new one.
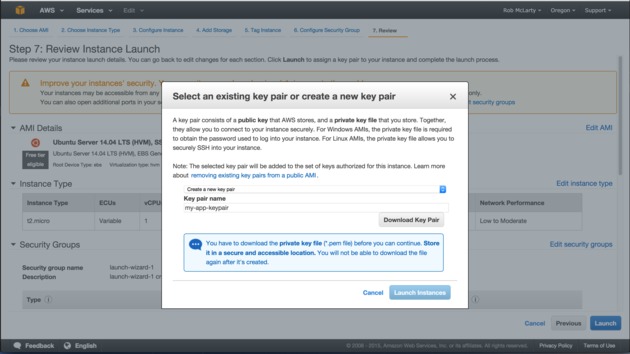
Create a New Key Pair
Creating a new key pair is as easy as giving it a name and then hitting the "Download Key Pair" button. The name you choose is what will show up in the drop-down when you go to choose which key pair to use. Save the key to your local disk in a secure location which can't be accessed by anyone but you and ssh. I like making a folder just for my ssh keys which has permissions only for my user to read and not modify.
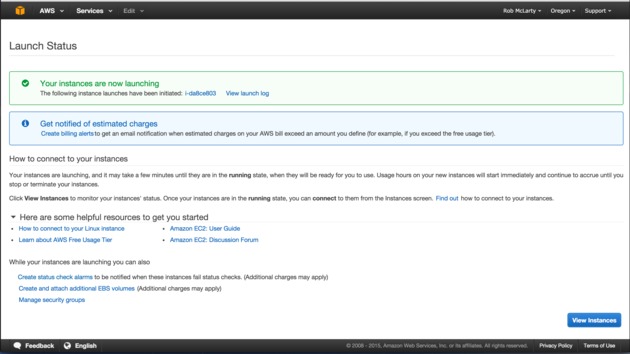
Launch
After choosing your key pair, the launch process will begin. The resulting page should notify you when your instance is ready to go.
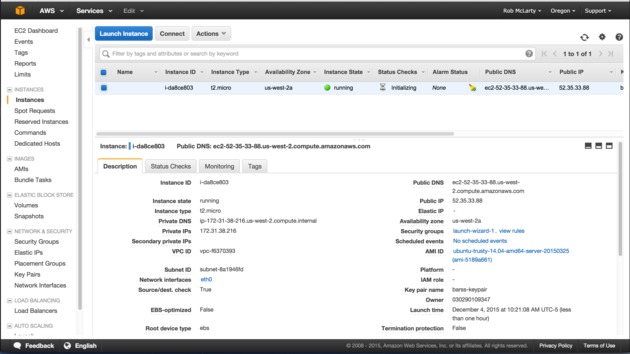
Check It Out
If you clicked the "View Instances" button on the previous screen, or if you choose "Instances" from the left hand EC2 menu, you'll see a screen which will list all your currently active EC2 instances along with some status information. Most importantly, this will tell you what IP address your instance is running on. Make a note of that so you can connect to it over SSH later ;)
And that's it! From here, you'll be able to connect to your instance over SSH and install whatever it is you want to install on it.